Hi, I’m GiGi, today I will show you how to make a seamless pattern in PHOTOSHOP.
In fact there are some ways to design a seamless pattern and now I will use an easy and nice for beginner way.
Now I open up my PHOTOSHOP
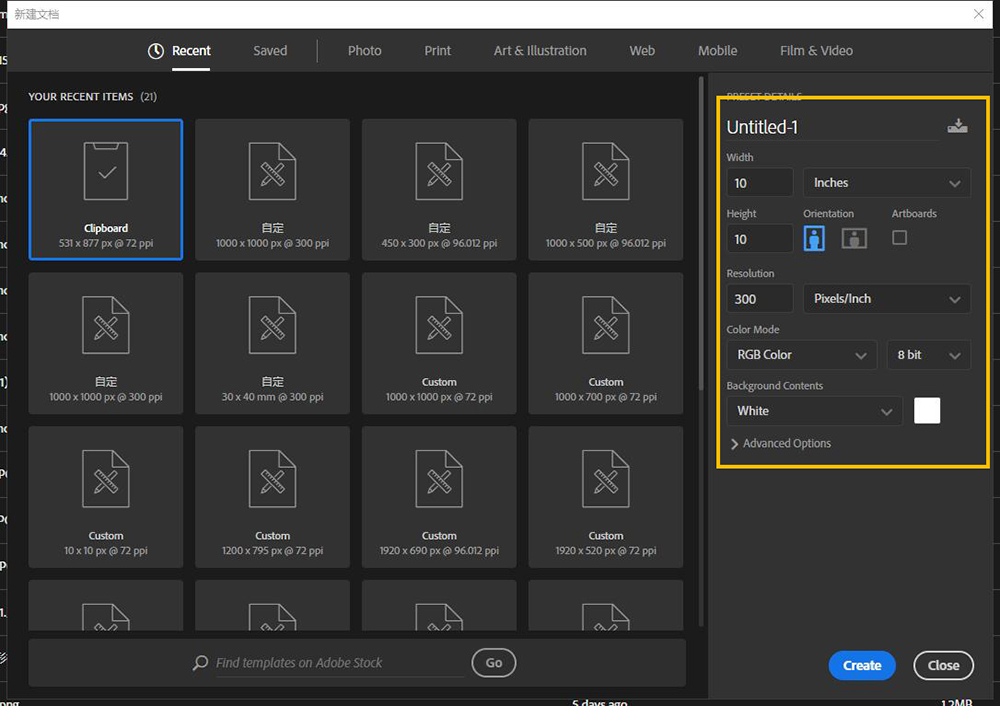
First, I need to create a new document and set up my canvas,
I set 10 by 10 inches and resolution is 300
So essentially 10 by 10 inches is going to be the full repeat
In other words our print will repeat every 10 inches
So we get a 10 inches square

Next I going to drag my selected clip art images onto the PHOTOSHOP square that I created
Now we can see the image has an X Cross in the center that means this is a smart object
What’s smart object?

Smart object is allow us to scale a layer up without significant loss of quality.
Just Press “ENTER” or double click to confirm image placing into square as a smart object
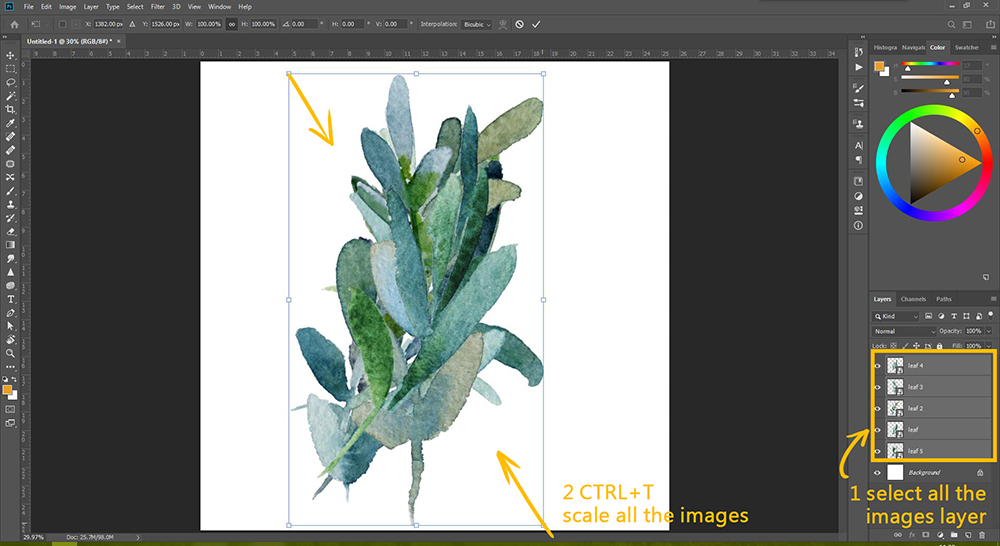
We can see all the images are superimposed and very huge
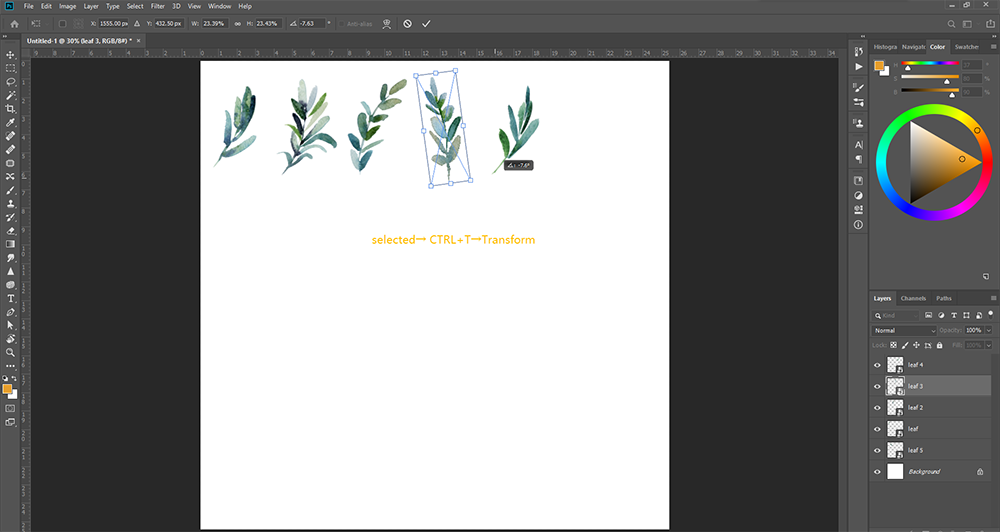
Next I going to select all the layers in the Layer window except background layer
Then Press CTRL + T to to transform and scale these all images to make them smaller at the same time.
While scale to the size you feel it’s OK double click in the blue square to confirmed the scale and blue square will disappear
Using the move tool

Deselecting all the layers
And then on the left-hand corner here we can see have Auto Select make sure it’s ticked
Then i click and select the image that i want to move
We can see the layer is selected automatically
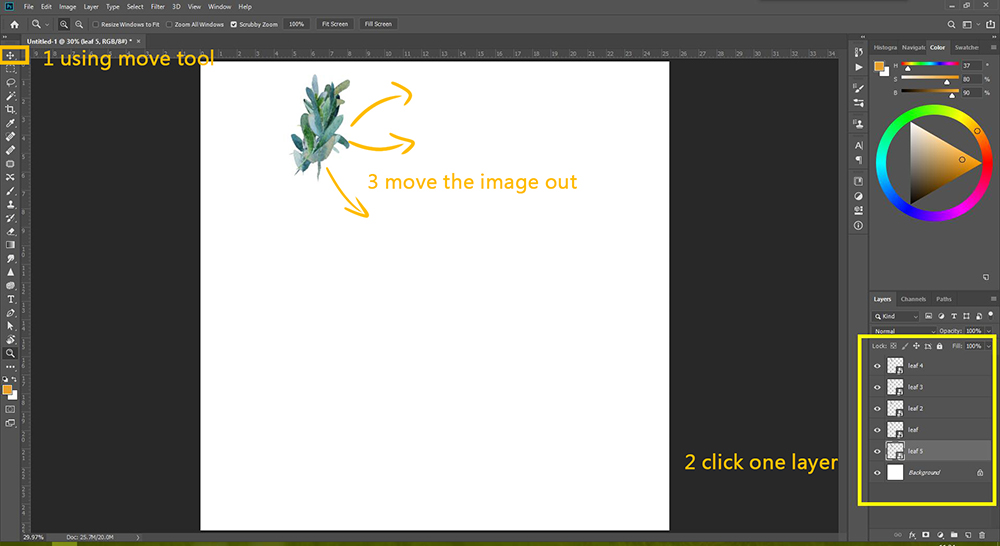
Auto select makes me much more easily to select image’s layer when moving
Selected the image move and place and rotate(CTRL+T) them.
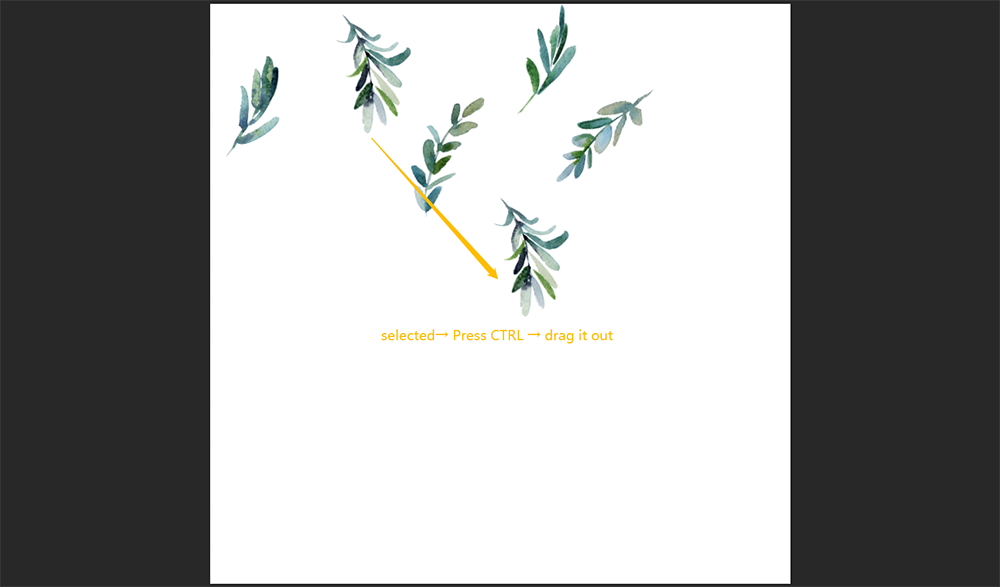
Now my print pattern clip arts is too empty I need to copy more
I select all the images and press CTRL and moving them out at the same time
and then I got more image adjust them to create an aesthetically pleasing layout for our print.
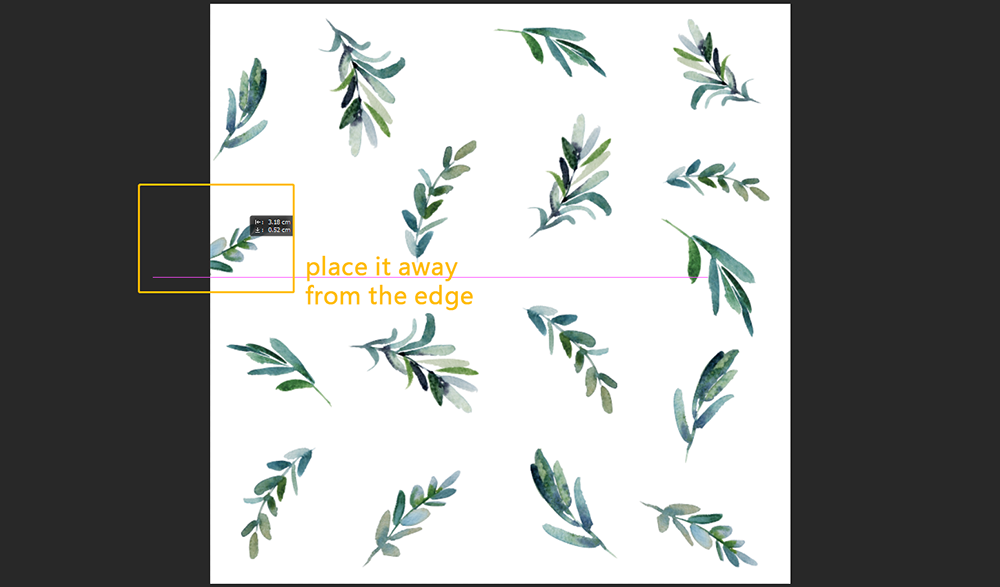
I usually place them away from the edge
Non of them going off the side like this
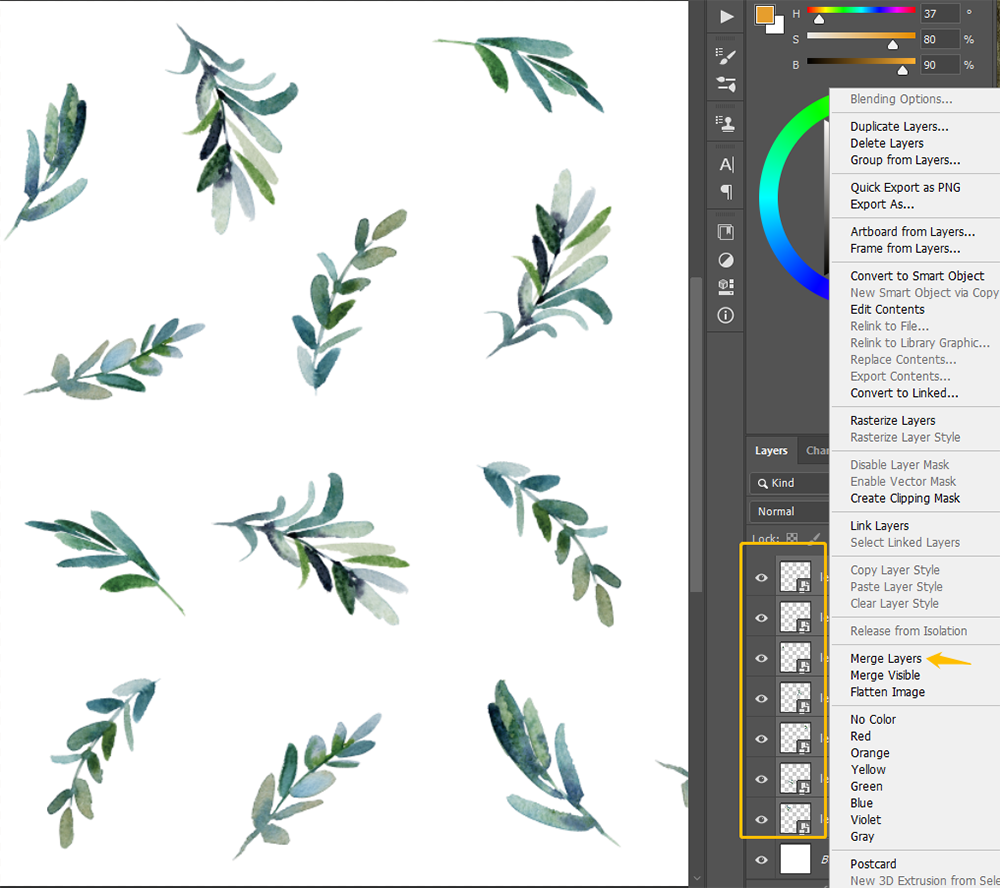
We’re going to next step which is turning this into a seamless print
This step I need to merge all the layers together.
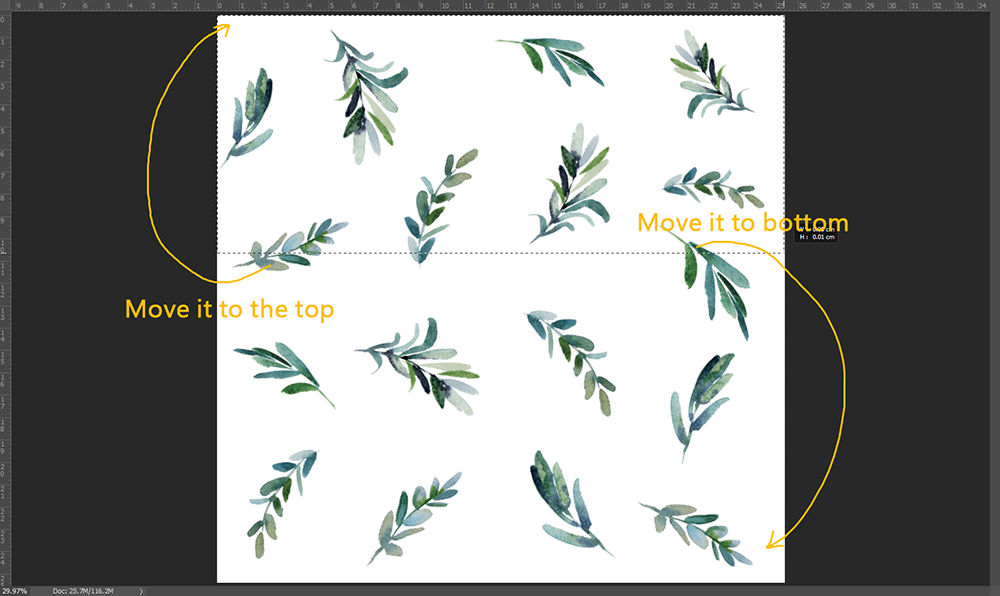
After that I will try to make the bottom edge and the top edge match
I will cut the top of this print remove this top edge move it down to the bottom of square
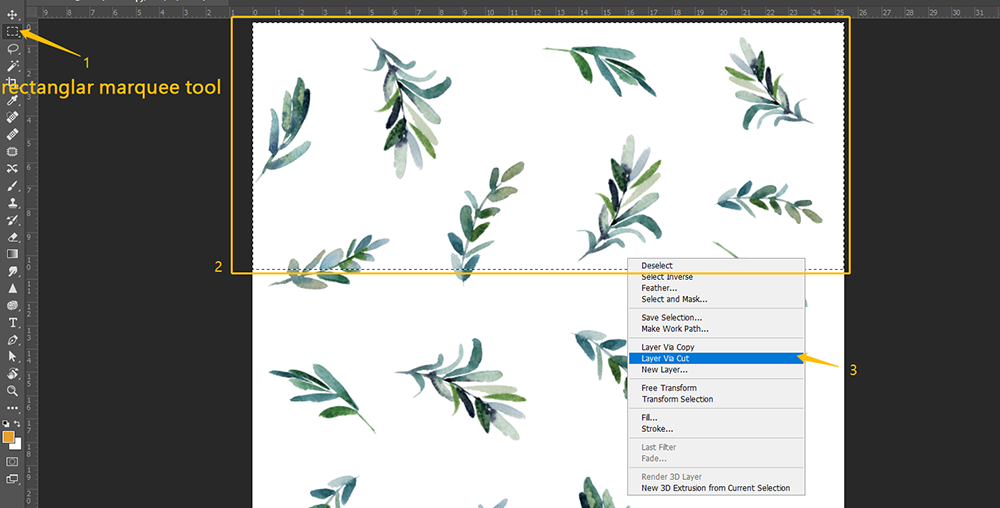
Using rectangular selection drag to select the top part and right click to choose LAYER VIA CUT
We can see one more layer is came out
This is our top part image.
Then we press V trans to MOVE TOOL but I not going to move it directly.
Because move it directly we can see the problem is it’s going to move around.
I need to make sure is moving on one direction and perfect match the edge of canvas.
On the top we can see these icons

These are Align Tools but not is unactivated we need to select must two or more layer to activate it.
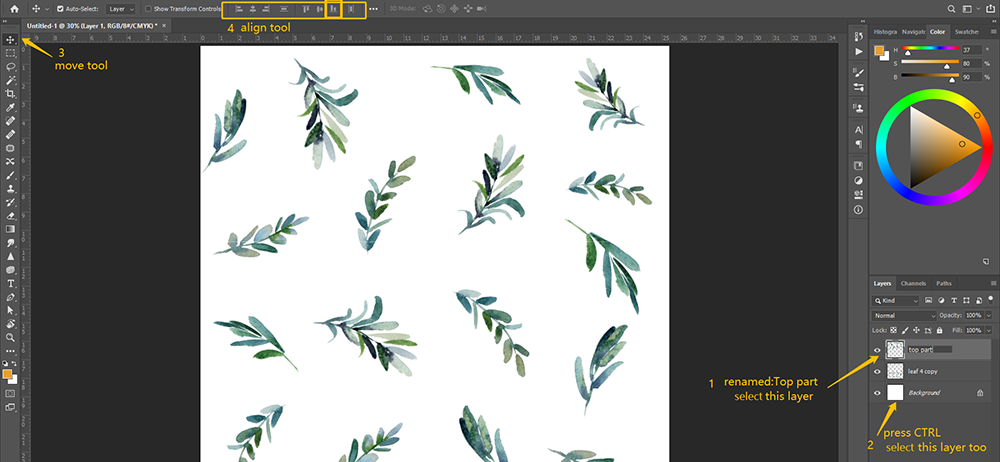
In this case I need to choose background layer as a reference for align moving.
Select top part image layer and background layer then click

(align to bottom)
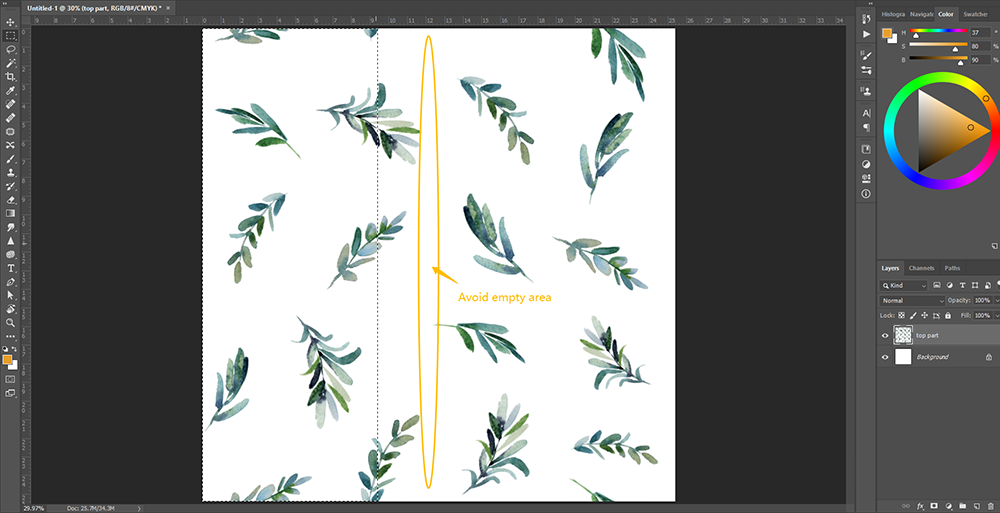
And then move other edge up the top

Select below part image layer and background layer then click

(align to top)
In this way the edges will perfect match when you tile them vertically
Next we do the same for the left and the right
Merge layers together expect background layer
When we cut the layer into 2 part should avoid the empty area.
Selecting right part image and rihgt click and LAY VIA CUT
CTRL and click background layer
Then click

(align to left)
Select left part image layer and background layer then click

align to right
Merge images again
Now we can see it’s a little bit strange in the middle and I going to adjust the images to make it looks better.
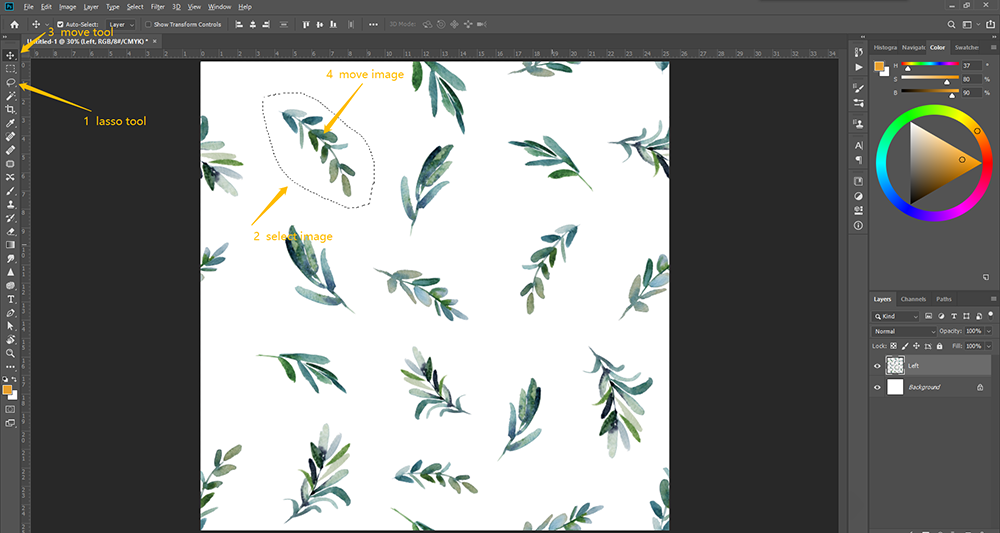
Using LASSO TOOL

select the clip arts I want to move.
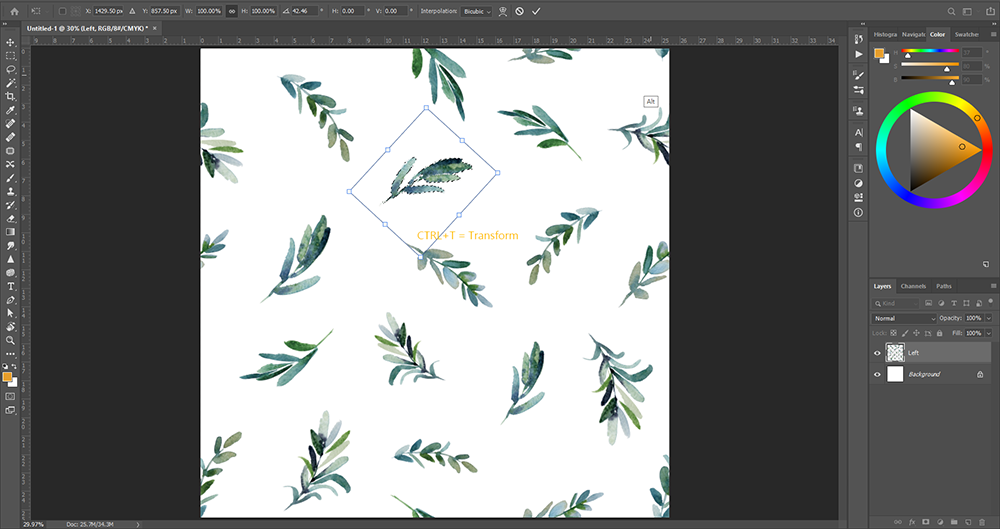
Then giving it to MOVE TOOL move it and we can transform it (CTRL+T) rotate it.
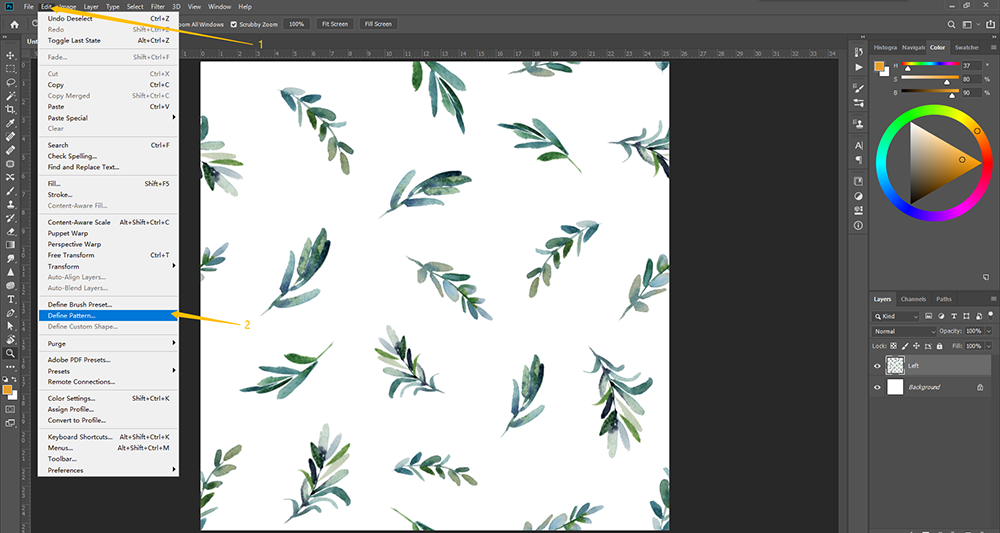
After that I think it’s OK now I want to see it looks like when it repeat.
Edit -- Define pattern and named it LEAVES ----OK
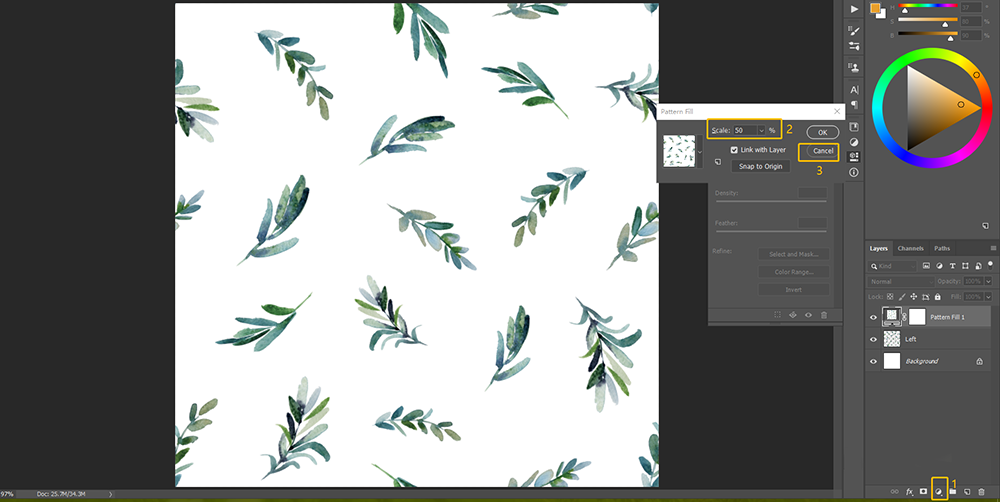
Then at the right side bottom we can see this

icon click
Then select PATTERN
Change the scale into 50% we can see 4 repeats
Cancel pattern the preview
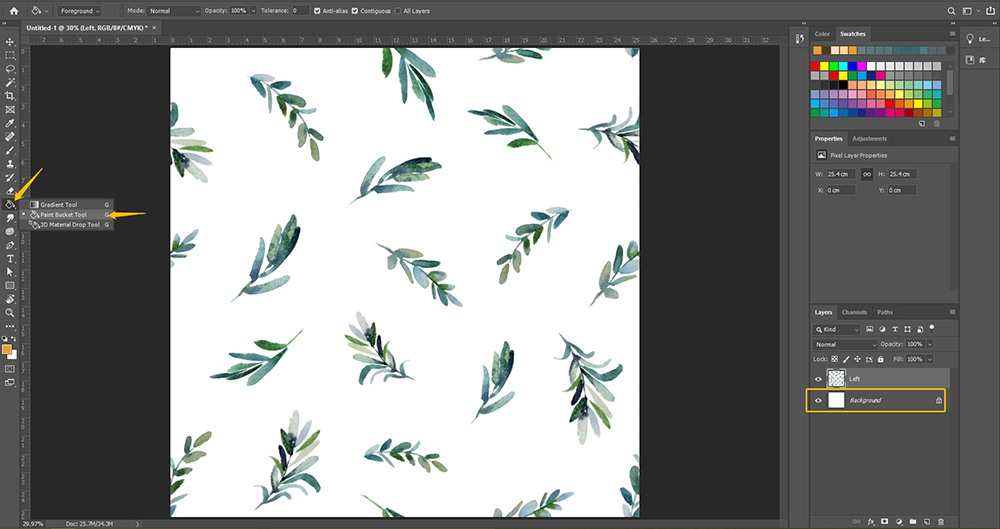
So this’s our seamless print pattern but this pattern only has a white background
We can change the background color with PAINT BUCKET TOOL select the background layer
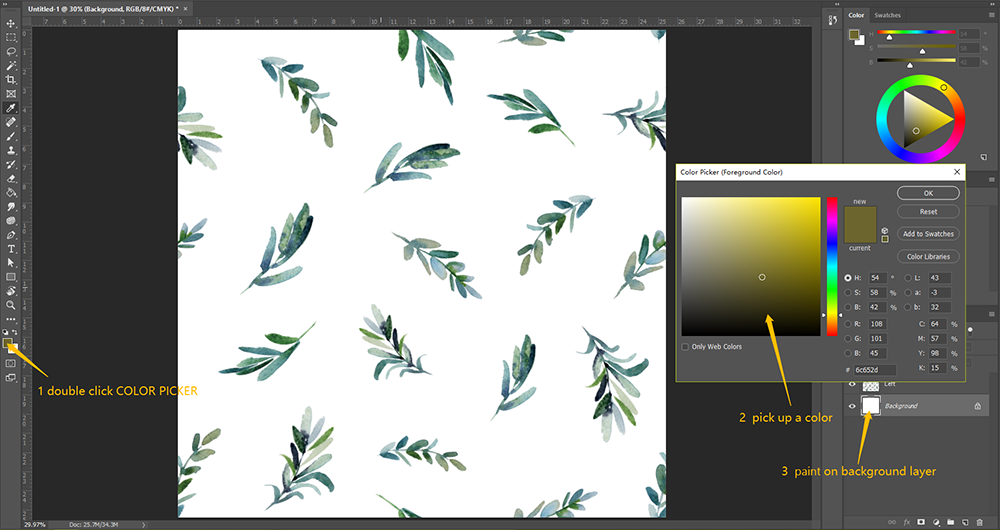
Double click Color Picker choose a color you like
Then click in the canvas to paint color in background lyaer

Or we can use other background image
New background image should palce under the seamless image layer
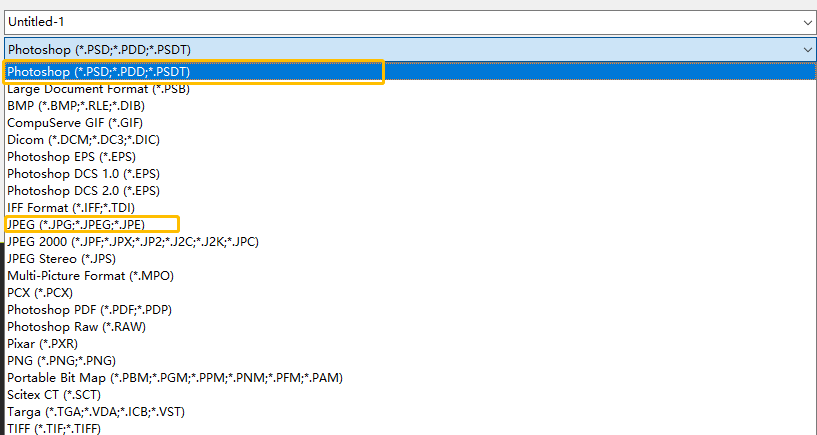
Finally I will save as PSD in case for modify in the further and save one JPG file to factory to print.
Thank you for reading! If you have any questions about the tutorial please leave a message we will answer for you.
And please subscribe to our web we will make more tutorials about fabrics.